
How does 3D street art work?
You have a template, a motif that you would like to paint in 3D on the floor? How does it work? How can I transfer an image to the floor in 3D?
This is the first part of my tutorial, where I first discuss the camera, or the smartphone and its position. Later, after all, we want our image to look three-dimensional on a photo. This will only work if you understand at the beginning why the right position of the camera is so important.
The position and tilt of the camera is crucial!
This is the first important point you need to consider and understand. If you want to paint a cube, a sphere or a cone, as in this example, you want the objects to look like they are standing on the ground. So like the real thing.
Here are the three objects as they look from a camera’s point of view, when the camera is held one meter above the ground and completely straight. The distance of the camera to the image is two meters, which is a good distance for almost all 3D street images.
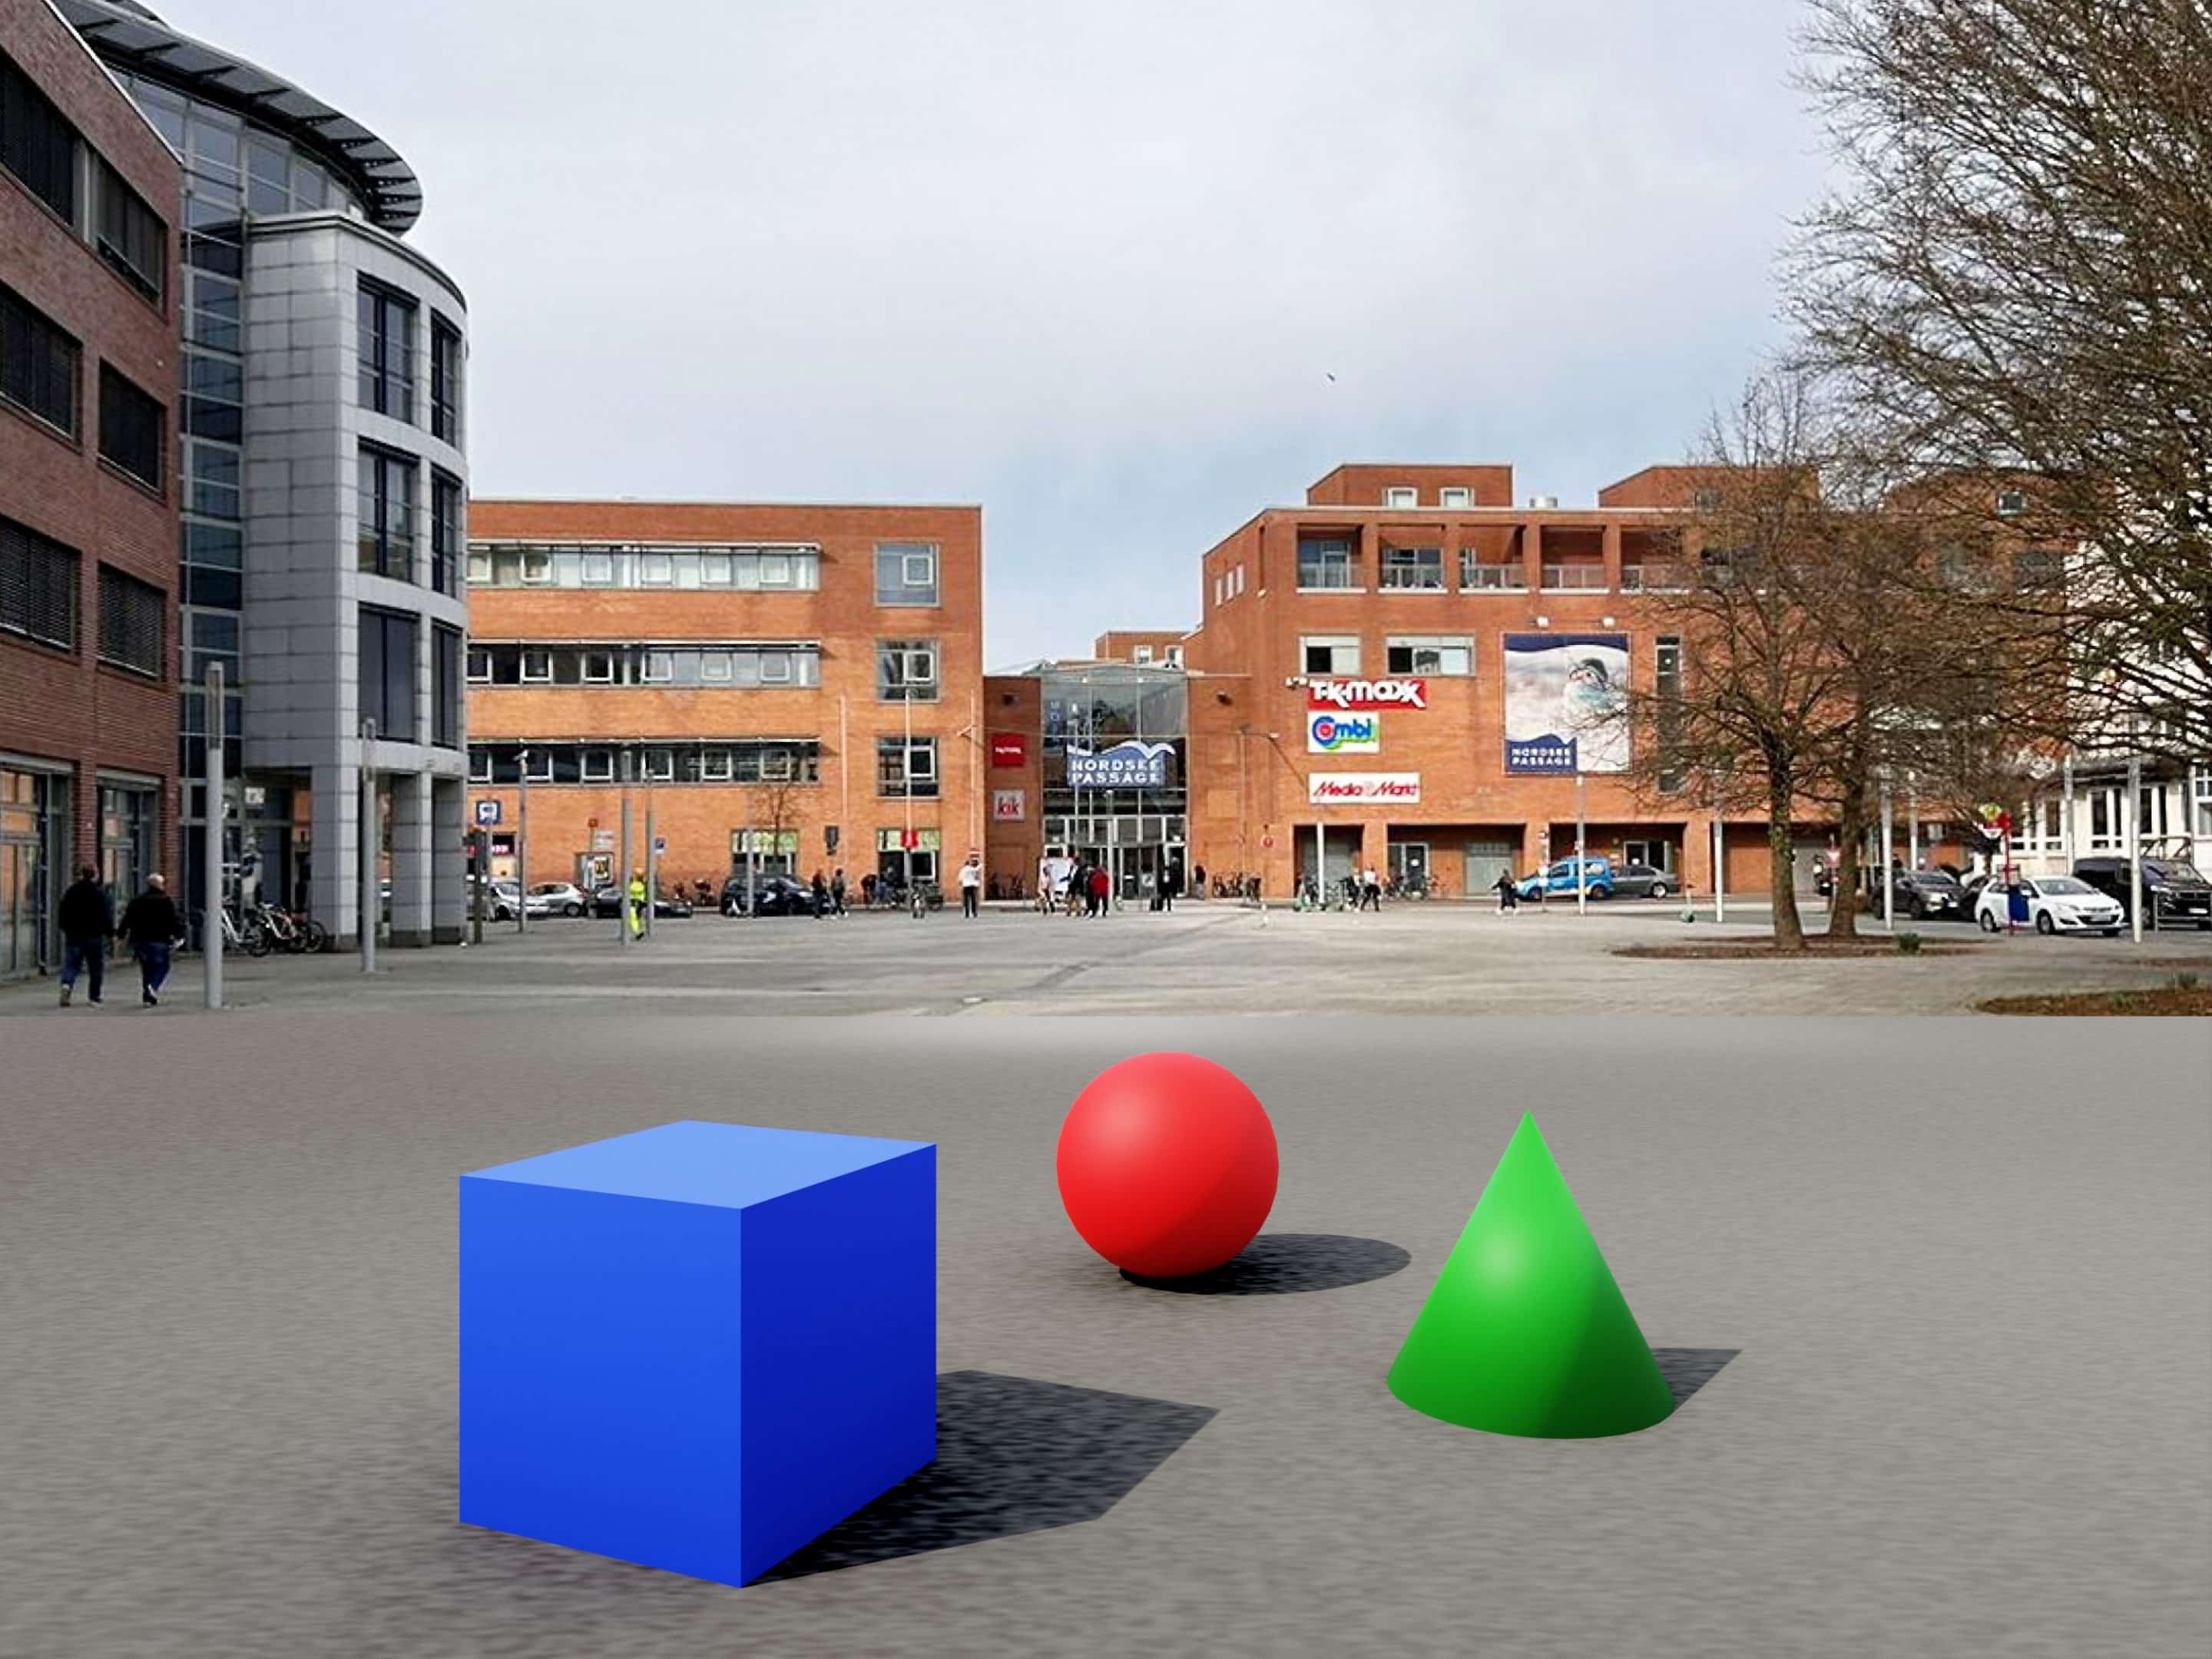
You can clearly see here, especially with the cube, that the objects are not distorted or tilted. The vertical edges of the cube are also vertical, or straight.
That’s because we keep the camera at ninety degrees in relation to the ground, so straight. The edges of the houses are also straight.
You can easily check this by taking photos of buildings with your smartphone. If you hold the camera completely straight, the edges of the houses are also straight. If you tilt the camera forward a little, you can see in the photo how the edges of the houses diverge further and further upwards, or how they converge further and further downwards, the further you tilt the camera forward. Try this out. Then you have already understood a very important point of perspective laws.
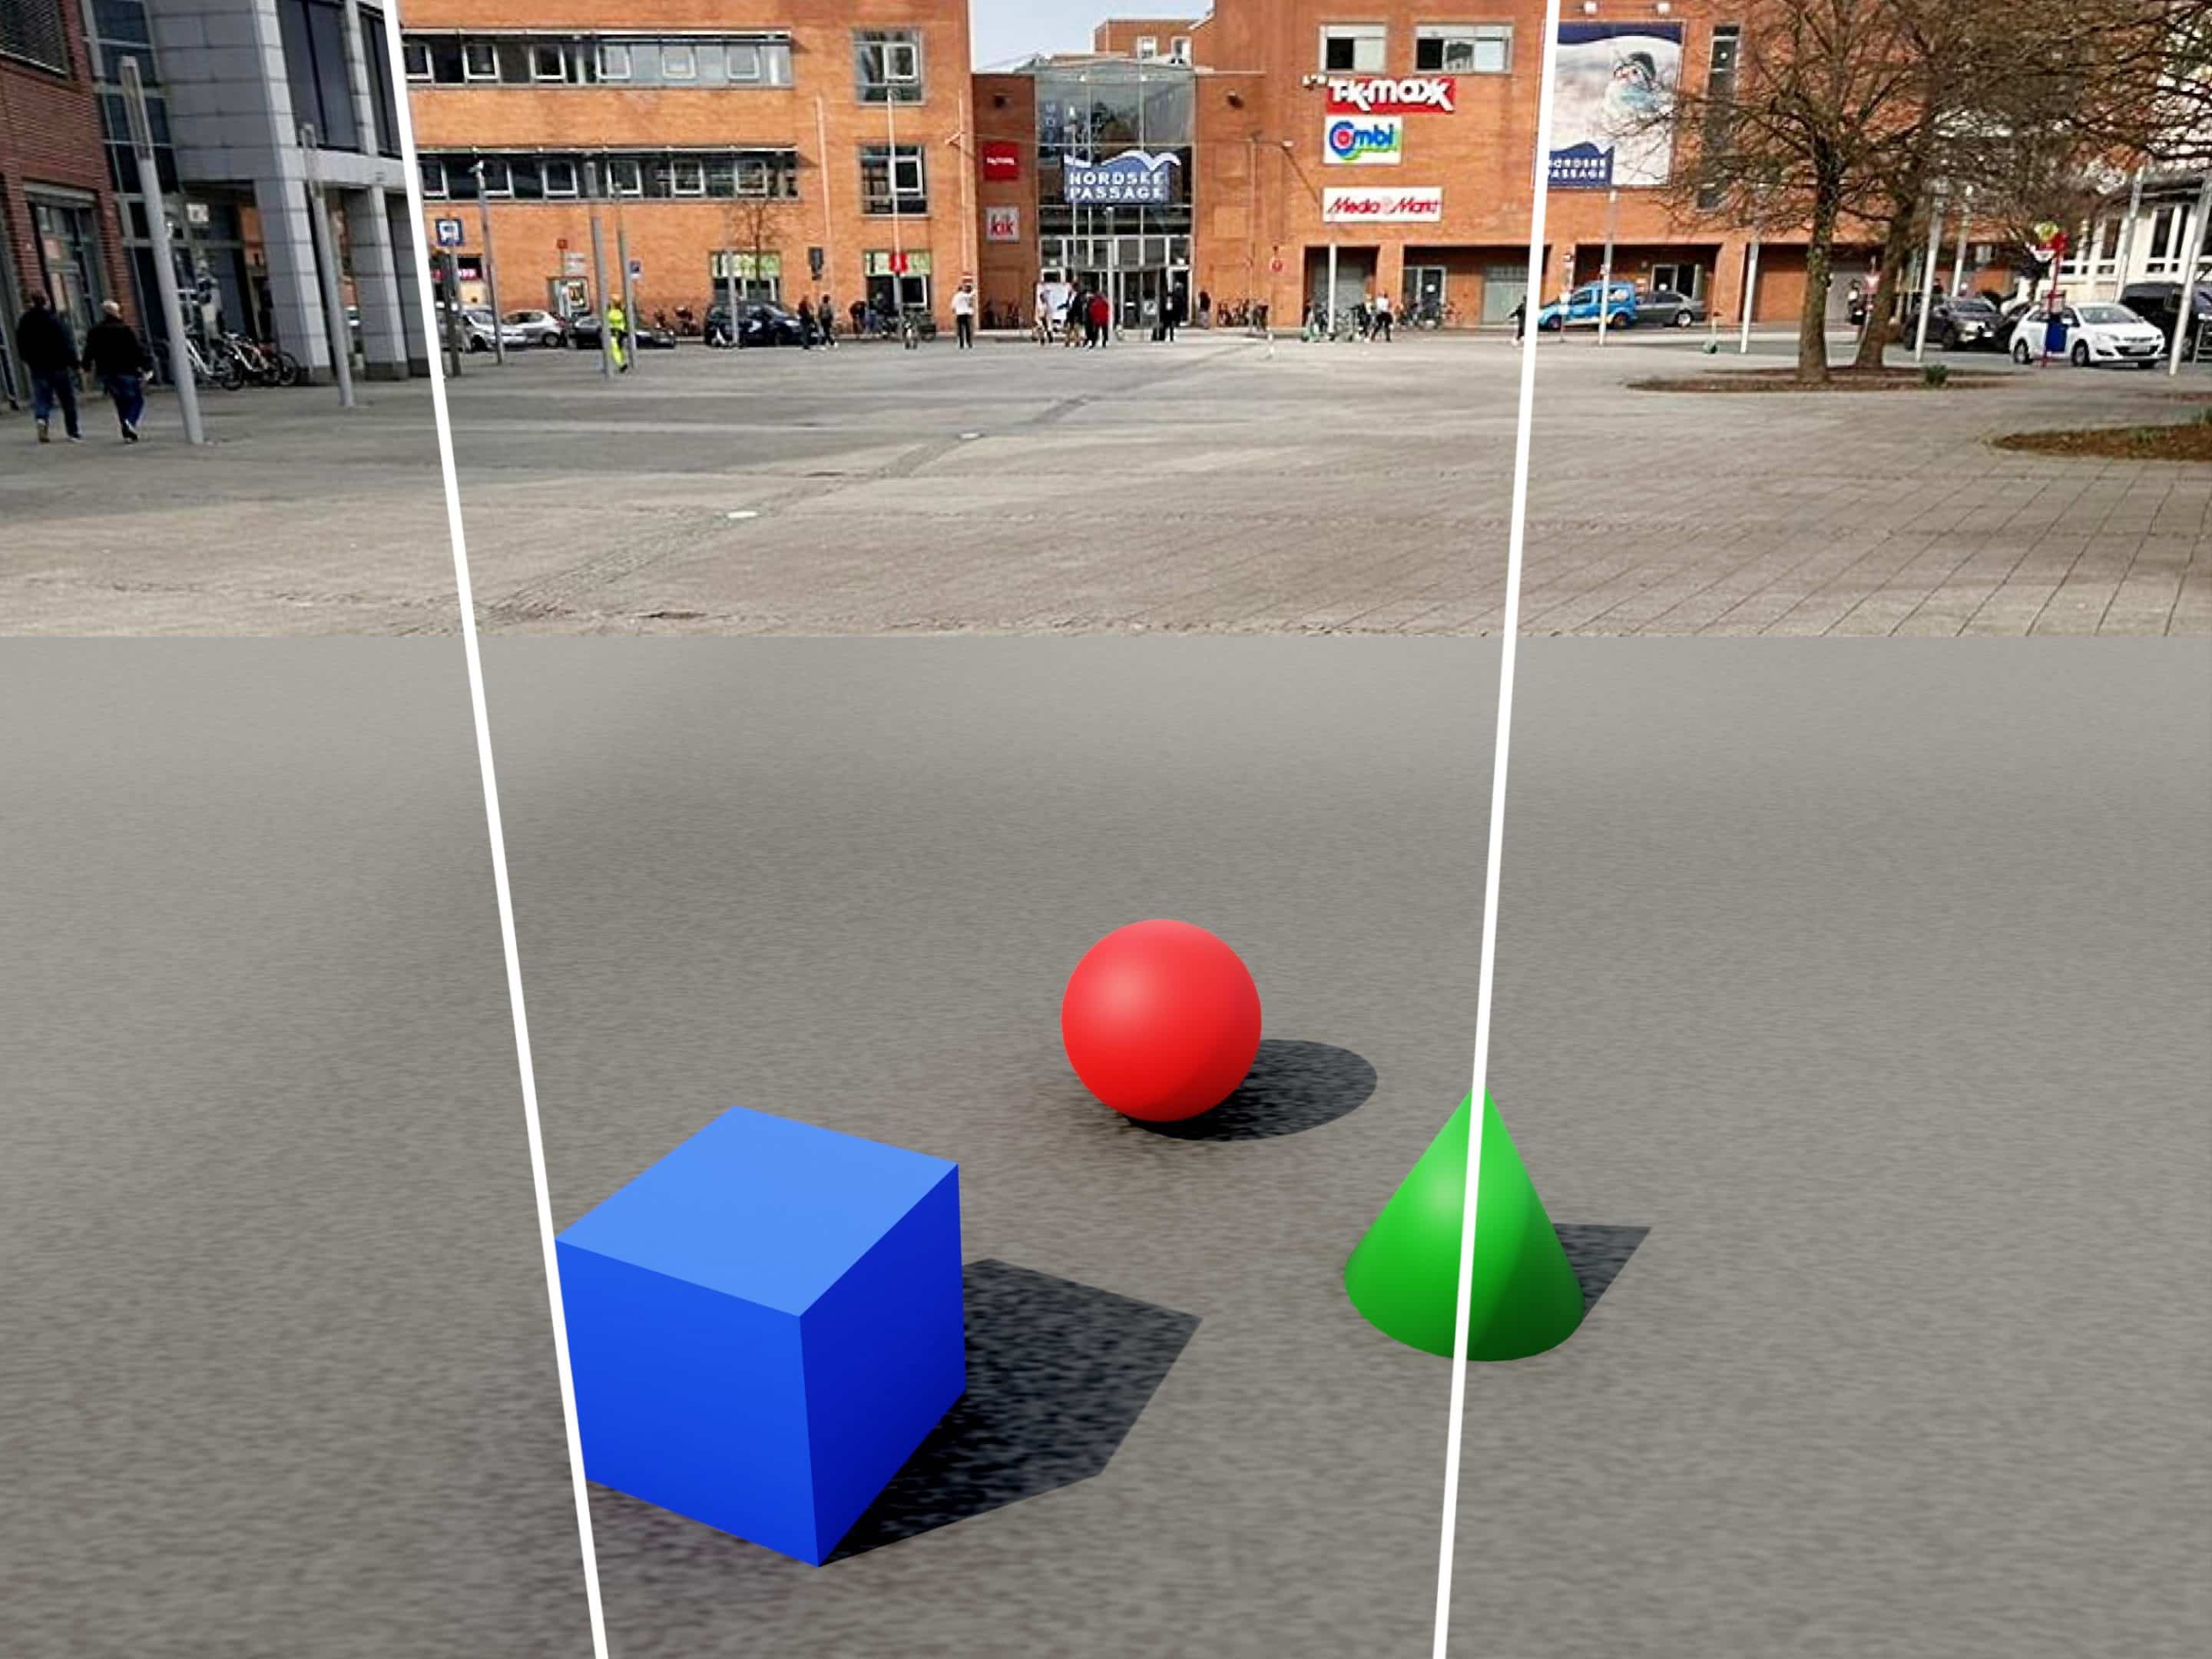
In the picture below you can clearly see what happens when the camera is tilted. The edges of the houses are not straight. Our three test objects are not straight either, or you can see in the case of the cube that the edges, which are actually vertical, do not run vertically downwards. You can check this by comparing the vertical edges with the edge of the image – are they parallel?

On the next picture I have drawn two auxiliary lines to show what I mean by “tilting”. This applies to all verticals in the image. The streetlights in the upper right of the picture or the billboard on the right building are also distorted. This is the crucial difference between a camera that is held completely vertically and one that is tilted.
Why it’s best to use a tripod
If you hold your phone perfectly straight, you have ninety degrees to the ground, or zero degrees in camera tilt. Now, to determine exactly what the tilt angle of your camera is, you need to be able to measure that somehow. Estimating also works, but only with some experience and practice.
So you should use a tripod on which you mount your camera or smartphone.
There are tripods with a tilt head where you can read the angle. If you only have a normal tripod where you cannot tilt the tripod head, you have to tilt the tripod yourself.
You can then measure the angle on your smartphone in a corresponding app. On my iPhone, this works well with Clinometer. You need to search for an app with the keyword “inclinometer”.
You can also attach a simple holder for a smartphone to the tripod and use it to adjust the angle. You can also measure the angle with a set square from the stationery department.
This is automatically the case for a DSLR with a standard mount. If you take a holder for a cell phone, you should align it so that the smartphone sits exactly above the center of the tripod.
It is better if the camera is at a fixed point while painting. This way you can also quickly check on a photo if you are doing everything right.
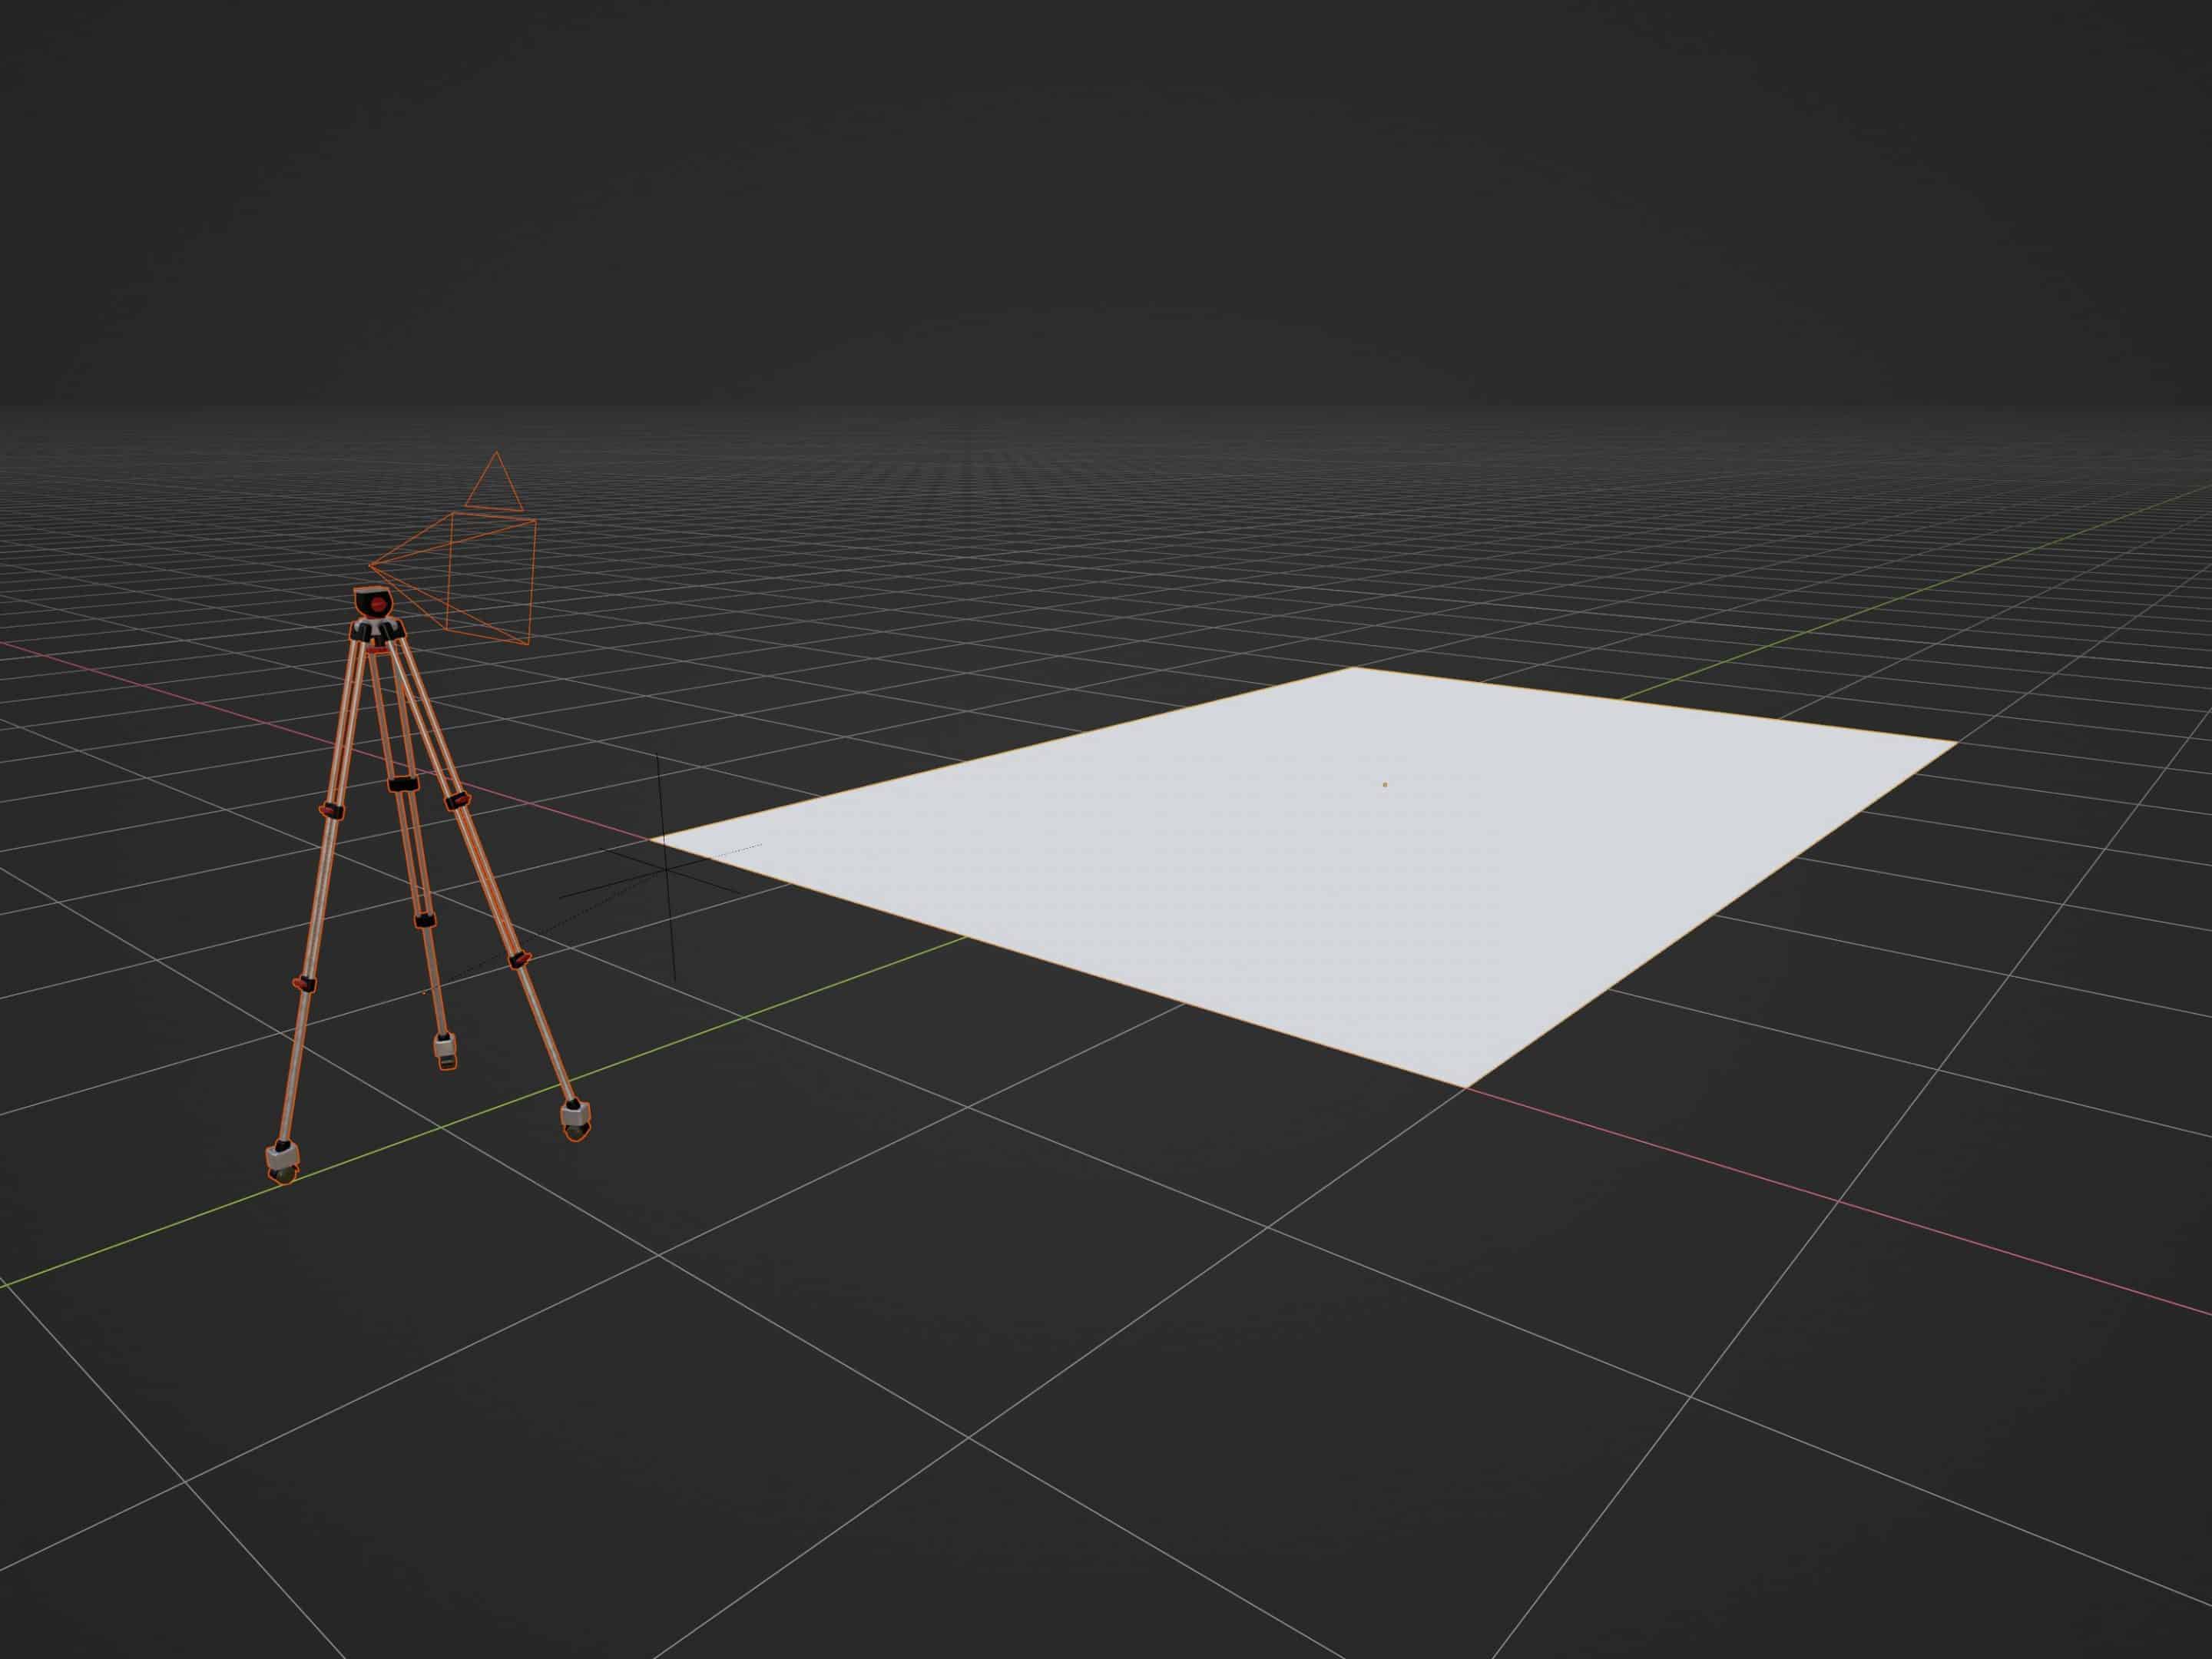
We have now already taken an important step in the right direction. The tripod is placed at a fixed point, at a height of 1.5 meters and at a distance of 2 meters from the center of the picture or the surface where the picture is to be painted.
Above you can see this area in white. The grid on the floor is divided into 1×1 meter boxes. As you can see, the dimensions are correct.
In the next part of the 3D Street Painting tutorial, you will learn how to transfer an image to the ground so that it appears in 3D from the camera’s point of view. At the moment there is only a white area. We will soon change that.
What are the methods to create a 3D image from a template?
The simplest method is to use a beamer or projector. But if you want to learn how the technique of 3D street painting works, I advise you to use the grid method (part II of the tutorial follows), at least in the beginning.
This way you better understand the perspective laws of linear anamorphosis, which is actually the name of the technique.
Meanwhile, there are also beamers that are small and even run on battery. However, a projector must always be used in the dark, otherwise you won’t be able to see the projected image on the floor.
The daylight outshines the light of the projector. This is a decisive disadvantage compared to the raster method. This works always and everywhere, because it does without electricity and technical aids.
Also, later on, when you have some experience with the grid method (Part II of the tutorial follows), you can very easily transfer just individual parts of the image to the floor. Often it is not necessary to rasterize the whole motif. Much can also be pre-drawn in this way. Eventually, after a lot of practice, you’ll have a grid in your head and can get by without it.
Tutorial-3D-Street-Art-The-Camera.pdf